Category: going paperless

Schedule for the Rebooted Going Paperless Series

I have a tentative schedule for the rebooted Going Paperless series. Like the original series, I plan to do a weekly post. The regularly scheduled series will begin on Tuesday, December 29. Every Tuesday thereafter, a new Going Paperless post should appear. So far, I have the first half dozen posts planned out, which would take us through early February. I’m sure I’ll come up with more as time goes on. Of course, I am also open to suggestions.

The first regular post on December 29 will be a simple tips for folks who want to get started going paperless in 2016. So if you are interested in getting started, look for that post at the end of the year.

There may be weeks that I have to skip due to other deadlines, but I am trying to minimize those by writing as many of the posts I can well ahead of time. This is different from my approach in the original series, when I was essentially writing the posts in real-time.

In addition to being available here, the new Going Paperless posts will also be available on Medium, for folks who prefer to read things over there. And of course I will announce each new post on Twitter, and other social media.

Going Paperless 2.0: My Mobile Paperless Office, November 2015 Edition

Back in December 2012, I wrote a Going Paperless post that described my mobile, paperless office. A lot can change in three years, especially when it comes to technology. I wanted to use this inaugural post of the rebooted Going Paperless series to describe my mobile paperless office today. Here it what my mobile paperless office looks like:

My mobile paperless office, November 2015
Click to enlarge

Starting in the center and working around clockwise, here is a description of what makes up my mobile paperless office:

1. My MacBook Air

I got my MacBook Air about 15 months ago, and it pretty much goes with me wherever I go. For a while I was using a Google Chromebook, and that worked surprising well, but there were some tools I wanted with me that I couldn’t use on a Chromebook. (Mostly developer tools like Mathematica, for instance).

I write on my MacBook, of course. And I have Evernote and Skitch available there so I can quickly refer to anything in my Evernote inventory. But I do other things on my MacBook. I write code, I edit photos, and occasionally, I even play games.

I like the MacBook Air because of its long battery life, and relatively low weight and profile. It is easy to lug around in my backpack.

2. Moleskine Notebook, Evernote Edition

Perhaps one of the biggest changes in my mobile office in the last 3 years is the addition of paper. I have been using an Evernote Moleskine notebook for about 5 months now, and I find it incredibly helpful.

It might seem counterintuitive to add paper to a paperless system. But I call my process going paperless because it is an ongoing and evolving process. Two steps forward, one step back. Except, I don’t think of the addition of my Moleskine notebook as a step backward. I switched to it for one primary reason: I found that when taking notes, I remember things much better if I write it out as opposed to typing it out. Perhaps this is a change that has come with age. My memory just isn’t what it used to be.

It has had a few positive side-effects, one of which is that I tend to capture more in real time than I did when I tried to keep notes directly in Evernote on my iPad or iPhone.

And of course, all of these notes find their way into Evernote. I use the Scannable App to take snapshots of the pages, which then get loaded into Evernote. What’s more, my handwriting is clear enough that the text in most of handwritten notes is searchable within Evernote, making it easy to find things that I have written down.

3. Pilot G2 Pens (0.7 mm, Black Ink)

I’ve found this particular pen to be the best one to use with my Moleskine notebook. Everyone has their own favorite in this respect, and like organizing notes in Evernote, you have to do what works best for you. In my case, after trying out a few different types of pens, I settled on these as the best.

I’ve used up nearly two pens in the 5 months that I have been using my Moleskine notebook, and so I’ve taken to keeping spare pens in my backpack, in case one should go dry in the middle of what I am writing.

4. Karma Go WiFi Hotspot

Over the years, it has been rare when I have not had access to the Internet from wherever I may be. Sometime I have to pay for it, and when I saw what Karma was doing with their new WiFi hotspot device, the Karma Go, I jumped on the chance to get one. I have been very happy with my device so far. It is a pay-as-you-go device, and you are credited with data when other Karma users connect to your device–so there is a kind of pay-it-forward mentality to using it.

It has already come in handy on several occasions, most notably when I was working from home one day and we had a rare day-long cable/internet outage. I fired up the Karma Go, and was able to continue to work, and at high-enough speeds that I really didn’t notice a difference.

The Karma device had come in handy also when I am out somewhere with my laptop and need WiFi. Sitting at the park, watching my kids play, I can fire up the Karma Go and have the access I need to get some writing or other work done.

Read more

Going Paperless 2.0: The Reboot

Last week, I did a Twitter poll to see if folks would be interested if I rebooted my Going Paperless series into a kind of 2.0 version. I’d revisit some old ground for newcomers, but forge ahead into new territory, talking about how I’ve changed my processes along the way, and describing new use cases I’ve found for Evernote and Going Paperless. The result was overwhelmingly positive.

Since then, I have been working on a plan to make this happen. I am still working out a schedule, and a list of post ideas to work off of, but it occurred to me that one possible topic of interest for folks sooner rather than later might be on how my mobile paperless office has changed.

Three years ago, I wrote a Going Paperless post which described the contents of my messenger bag. Essentially, it described my mobile paperless office. Lots of things have changed in three years, including what makes up my mobile paperless office.

So, later today, at about noon Eastern Standard Time, the first new Going Paperless 2.0 post will make its debut, describing what my mobile paperless office looks like today.

As I said, I don’t have a set schedule for the series as a whole yet, but I am working on it. In the meantime, I wanted to make at least one new post as a kind of thank you to everyone who responded positively to last week’s survey.

Stay-tuned later today for the new post.

Poll Results: Folks Would Like More Going Paperless Posts

The results of yesterday’s Twitter poll came in this morning. It would appear that folks are overwhelmingly in favor of more Going Paperless posts, and that makes me happy. The poll also got more responses than I imagined, and that makes me happy as well.

Going Paperless Poll Results

Next Steps

I need some time to figure out the best way to do these posts. Part of the reason I stopped the initial series was because I felt like I was beginning to cover ground I’d covered before. Part of the reason was that I felt like I’d run out of use cases to write about. I’d like to have a fairly good list of topics to cover in order to get started. I’ve got 2 right now, but I’d like to get a few more. If you have ideas or suggestions for topics you’d like to see me cover, drop them in the comments.

Also, there is some ground that I will need to cover again for two reasons:

  1. The way I do things may have changes (been refined with practice, I like to think.)
  2. Newcomers to the series of posts might need a more clear introduction.

So I have some things to consider, among them:

  • What to write about
  • How frequently to write
  • How much updating of old territory is necessary

Once I figure these things out, I’ll set a schedule and announce the new series so that folks can follow along, and participate. One thing that made the old series great was good participation and suggestions from readers. Everyone works a little bit differently and how I do things may not be how you do things, but we can learn from each other’s ideas.

Thanks to everyone who participated in the poll yesterday. Stay tuned for more on when you can expect to see the new series kick off.

Over on Twitter, A Poll About a (Possible) New 2.0 Version of My Going Paperless Series

Earlier today, I took advantage of Twitter’s new poll functionality to ask if folks would be interested in a new 2.0 version of my Going Paperless series. There’s about 15 hours left in the poll if you are interested in getting in your response.

Going Paperless: On the Qualities of Useful Paper

If Sherlock Holmes lived in a paperless world, he might have said,

When you have tried to eliminate all paper, whatever remains, however improbable, must be useful.

In the years that I have been on this journey to go paperless, I’ve found that there is some paper that, no matter how much I’d like to get rid of it, I still find useful. In the last year or so, two types of paper have managed to survive, and recently, I have given up trying to get rid of them. Like a virulent strain of bacteria, these have survived my attempt to banish them, only to come back stronger.

As I have often emphasized in these posts, going paperless is an ongoing and evolving process. I will never be completely paperless until the rest of the world is completely paperless–something I very much doubt I will see in my lifetime. Going paperless means process the paper I do get, and minimizing the paper I use, but there are still a few places where I find paper useful.

1. Moleskine notebooks

In the last few months my primary method for taking notes has reverted to paper. I use an Evernote Moleskine notebook to take notes in meetings, and on phone calls1. If I watch a video on YouTube, I’ll jot the notes down in my Moleskine. I’ve found a renewed fondness for scratching out the notes with a pen on paper, but it is not this fondness that drives my use of the notebook: it’s my memory.

A page from my Evernote Moleskine notebook

I have found that, as I’ve grown older, I remember things far better if I write them down as opposed to typing them out. I’d read articles that discussed how handwriting had good cognitive benefits, but until I tried it myself, I wasn’t convinced. Of course, it could entirely be a placebo effect, but I feel like I better remember my notes when I write them out in a notebook, than when I type them via a keyboard2 Actually, this makes sense. Back in college, I wrote all my notes for lectures and reading in a notebook, and on later typed them into Microsoft Word 5.5. for DOS3. I was younger, but writing the notes, followed by typing cemented them in my mind.

Getting my handwritten notes into Evernote

Just because I’m writing the notes in a notebook doesn’t mean they don’t find their way into Evernote. I use Evernote’s Scannable app on my iPhone to pull my handwritten notes into Evernote. Here is the same page of notes from above captured in Scannable:

Read more

  1. And because I will almost certainly be asked, I use a Pilot G-2 0.7 pen to write in my Moleskine
  2. Of course, this is me. Things might be wired differently for you.
  3. Still my favorite version of Word.

Going Paperless: Mobile Scanning with Evernote Scannable

I keep my eye out for apps that can help save me time and be more productive. So when Evernote recently released their new app, Scannable, I was eager to try it out. Not only was it designed to do one thing really well–namely, scan documents–but it filled a niche that I found I needed more and more in my efforts to go paperless.

For those who aren’t familiar with the app, Scannable uses the camera in your iPhone or iPad1 to scan documents into Evernote (or other apps). It makes it incredibly easy to do this. You simply start the app, hold the device over the document so that the entire document appears, and wait a few seconds while Scannable detects the edges, and snaps a photo. You don’t have to click button. Scannable does it all. It cleans up the image, makes sure the edges are straight, and then gives you the opportunity to send the document to Evernote or other applications.

How it works

First, you start the app. Then you hold your device over the document you want to scan, and wait a second or two. When the document is highlighted in blue, it means Scannable has detected it and automatically grabs the image. Note how the document below is highlighted and detected even on the edge of my table.

Scannable scanning

Once detected, you can continue to scan more documents, or deal with the ones you’ve already scanned.

Scannable action

When I finish my scanning, I send the document or documents to Evernote. Doing this, I am prompted for which notebook I want the documents to be filed in:

Scannable file

A few seconds later, my scanned document is available in Evernote.

Read more

  1. Sorry folks, right now the app is just iOS.

Going Paperless: Distraction-Free Evernote

Over the years, I have become a big-proponent of two aspects of software: (1) That it is entirely web-based; (2) that it is as distraction-free as possible.

The first item has been an interesting transition. I used to like the secure feeling I got using a piece of software I installed on my laptop. But now, the fact that I actually have to install something on my laptop in order to use it seems quaint. I have, for instance, been using Google Docs almost exclusively for all of my writing over the past 2 years, and I love that I don’t have to install anything. I love that the experience is the same regardless of what computer I am using. I love the that updates are automatic since the application runs in the cloud.

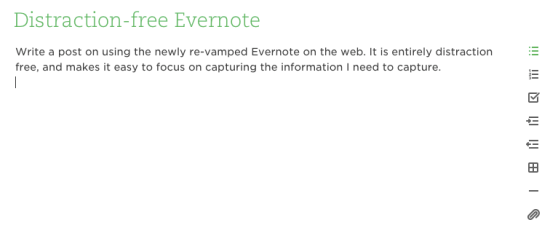
More recently, I have been looking for software that does a good job of getting out of my way. Eliminating distractions is a key part of this. Outside of email, the two applications I use most are Google Docs and Evernote. Google Docs has an excellent distraction-free mode. And recently, Evernote introduced a revamped web application that is distraction-free. I like it so much that I’ve almost given up the thick client for the web application.

Distraction-free Evernote

Here is what distraction-free Evernote looks like when I use it on the web:

Distraction-Free Evernote

I can just start typing my note, or drag a file onto the note if I want to attach something. Despite the clean, distraction-free screen, there is a still a lot of core functionality available when creating or editing a note.

Evernote Web Features

As I type, Evernote is saving what I type so that nothing is lost. You can see this at the bottom-right of the browser window. I green checkmark indicates that the document is saved. While typing, a circle rotates around the checkmark indicating that what you are typing is being saved.

And while there isn’t much else on the screen other than the note, there are still a rich set of features available. I can easily tag my notes, or refile them to another notebook. I can set reminders, or share the note, all from the simple screen.

Formatting the note

The distraction-free mode makes it easy to format the text of the note. If you hover over the small toolbar to the right of the note text, it expands into several icons that allows you to do some basic formatting like add lists, indent text, add a checkbox or a table, or even an attachment.

Evernote Format 1

Even better in my opinion, is the Medium-like feature that Evernote has introduced for formatting text fonts, and styles. You simply highlight the text that you want to format, and a popup format bar appears that lets you apply the formatting you want:

Evernote Format 2

Distraction-free searching

In addition to providing an elegant, distraction-free interface for capturing notes, the new Evernote for the web provides an equally elegant distraction-free interface for searching. Clicking on the search icon presents a simple search screen:

Read more

Going Paperless: Managing Social Media Profiles with Evernote and TextExpander

Once a year, I’ve gotten into the habit of reviewing and updating my social media profiles. You know, what I say about yourself on Twitter, or Facebook, or LinkedIn, and what I send to publications when they request biographies.

JTR Twitter

I generally only do this once a year, and I use 3 tools to manage the process:

  1. Evernote, where I store my profiles from year-to-year.
  2. TextExpander, in which I keep my updates profiles for easy insertion into email messages and other documents.
  3. The Press Kit page on my blog, where I made the profiles available to anyone who requires them.

The annual review of my social media profiles

I know that there are people out there who change their social media profiles frequently, but I strive for consistency of message. I also like to keep my profiles professional for the most part. So I review them once a year and decide what updates, if any, need to be made.

My profiles are easy to maintain because I use only 4 variants:

1. 140 character Twitter-specific profile

This profile is what I use for Twitter, and for any social media platforms based on Twitter which limit the profile to roughly 140 characters or so.

2. 140 character profile

This is a variant of #1 above, and allows me to have a very short profile available for outlets who request it.

3. 50 word profile

This is a profile I use when I have a little more space. I used this profile frequently when I wrote guest posts and a bio is requested to accompany the post.

4. 100 word profile

This is a profile I use for places that request a little bit more information, or want a little more background.

By maintaining just these profiles, I assure that the message I send out into the world about myself is consistent across the board.

I review these profiles at the end of each year, and I do it at the end because it provides a convenient marker for looking back at any new or significant accomplishments within the year that I might want to include in the profile.

I have written before about how I use Evernote to track my achievements. This comes in handy in updating my profiles each year.

Updating my profiles in Evernote

I update my profiles in Evernote, and rather than overwrite the old note containing the profile, I create a new note with the new profile, one for each of the four listed above. This allows me to see the overall history of changes I’ve made to my profiles over time.

I create one note for each profile, work out the kinks there, and use Evernote’s built-in character and word counts to make sure I’m sticking close to the lengths of each profile.

Profile Note

Once I am satisfied with the updates I’ve made to my profile, I copy the updates and paste them into the appropriate social media platforms.

Updating my snippets in TextExpander

One big time-saver I’ve found is to have my profiles and bios available as snippets in TextExpander. This allows two things:

  1. I can access them quickly, to reply to an email, or insert them in a web page, without having to hunt them down.
  2. I maintain consistency by not having to reinvent them each time I am asked for a profile or bio.

I use simple abbreviations for my snippets so that I don’t have to stretch my memory to recall them. Here is what the snippet for my 140 character (Twitter) bio looks like:

TextExpander bios

Updating my Press Kit page on the blog

The last step in the review process is updating my Press Kit page. I maintain this page as a place where media outlets and others can go to for accurate bios and author photos when needed for a publication or interview.

The Press Kit contains the most up-to-date profiles and bios that I have. Granted, I often only update my bios once a year, but as I try to keep them simple, the changes tend to be small and subtle


Having the information centralized and managed from Evernote is convenient because it makes it easy to search, and to see changes over time. Having the snippets in TextExpander probably save me more time than I imagine throughout the course of the year, especially as I am asked for these things with increasing frequency. Having them on the Press Kit page makes for a convenient self-service model.

Most importantly, for me, is the fact that the profiles vary in length, but not in message. They are consistent with one another, and that helps to ensure that I am sending out a consistent message for all of my profiles.


If you have a suggestion for a future Going Paperless post, let me know. Send it to me at feedback [at] jamietoddrubin.com. As always, this post and all of my Going Paperless posts is also available on Pinterest.

Last week’s post: How I Use Evernote to Remind Me of Everything.

Enjoy these posts? – Tell a friend

Recommending readers is one of the highest compliments you can pay to a writer. If you enjoy what you read here, or you find the posts useful, tell a friend! Find me online here:

Twitter | Facebook | Google+ | Reddit |  Blog | RSS

Or use one of the share buttons below. Thanks for reading!

Going Paperless: How I Use Evernote to Remind Me of Everything

Several months ago, I ended the regularly scheduled series of Going Paperless posts, with the emphasis on “regularly.” I felt that I was beginning to stretch the ideas I was writing about. I decided that I would only write new Going Paperless posts when I had a good idea. And so today I’m back with a post on how I use Evernote to remind me of everything.

I make use of a very simple to-do list manager that consists entirely of plain text files. It works well for me, but it has one significant drawback: there is no easy way to do reminders in my system. Fortunately, I don’t need that feature as part of my to-do list system because it is built into Evernote, and I use the reminder features there extensively.

Reminders in context

One of the great features of Evernote is that it allows reminders in context. I have written about this feature before, but it is worth re-emphasizing it here. Let’s say I get a document in the mail on which some future action needs to be taken–car registration, for example. Without Evernote, I might toss a copy of the document in a pile on my desk, with a Post-It note reminding me when it was due. I might also stick a note about it on my calendar. But the calendar note would be separate from the document itself and if I saw the note on the calendar, I’d still have to go hunt for the document somewhere.

With Evernote, I follow 3 simple steps:

  1. Scan the document
  2. Organize it appropriately (put it in a notebook, and tag it, if necessary)
  3. Set a reminder on the note to remind me that I need to take some action on it.

In the case of the car registration, I set the reminder to 10 days before the due date. When I look at my list of reminders in Evernote (on my home screen), I see it there waiting for me to take action.

Evernote Reminder

Clicking on the reminder take me to the document itself. Having the reminder linked to the actual document is a powerful feature. It does two important things:

  1. It saves me from having to remember to do the thing. Evernote will send me a reminder when it is due.
  2. It saves me from having to search for the document when I am reminded, because the reminder is attached to the document. This makes it much easier for me to act on the reminder as soon as it happens.

A substitute for Post-It notes

Over time, my Evernote reminder system has become a substitute for Post-It notes. I use it for all kinds of things. And all of those things have some sort of context attached to them so that it is easy to take an action. For example, have a reminder to test and change smoke detector batteries when Daylight Saving time begins. The note itself is pretty simple:

Smoke Detector Reminder

The “Instructions” link is simple an Evernote note-link to another note, containing the instruction manual for the smoke detector. Clicking on the link takes me to that note, so that I don’t have to go hunting for it.

Smoke Detector

I might have simplified things by attaching the reminder to the smoke detector instruction note directly, but in this case, I prefer to have a “history” of the times I changed the batteries, and so the individual notes give me that history: one note for each change/reminder. They get filed in my Timeline notebook so that they don’t clutter other things.

For those interesting in more information about using note links, I’ve written in detail about using Evernote note links elsewhere.

Read more

Coming Next Week: A Brand New Going Paperless Post!

Back in October, I announced that my regularly scheduled Going Paperless posts were coming to an end. The emphasis was on regularly scheduled and the reason was mainly because I felt like I was beginning to reach too much for ideas for the posts I decided that instead, I’d only write one when a good idea struck me.

I have a good idea for one now, and you can expect to read it next week, on Tuesday, December 16, if you are so inclined. (While you are reading the post, I will be wandering about Disney World with my family.)

Just wanted to give everyone a heads-up. You may now resume your regularly scheduled week.

Going Paperless: Using Evernote at Home and with Family

This is part 4 of my set of categorization posts which collects my Going Paperless articles into various categories to make them easier to find in the context of a given topic. And today’s topic is using Evernote to go paperless at home and with the family. As before, there may be some overlap with other categories, as some articles don’t fit neatly into just one box. They are listed beginning with the most recent articles.